This year I set myself the resolution to push myself outside my comfort zone, to be more creative and continue learning.
Enter Milk Paint by Fusion!
Confession time, I was so scared to try Milk Paint, the unknown is scary...oh my days there was no need! Within 10 minutes I was in love with the process!
This paint truly brings out your inner artist, it's so much fun!
Each month I do an online tutorial in my Fusionistas Nottingham UK Facebook group. March 21st I asked the wonderful Jackie from A Cupboard Less Ordinary to join me and share with you all the wonders of Milk Paint. Jackie has been painting with Milk Paint for 8 years and is an expert! The blue dresser above is one of her pieces...isn't it stunning!
Replay the tutorial to watch the demonstrations, below are the highlights of what we talked about...welcome to the first step on your incredible Milk Paint journey!
So, what is Milk Paint?

Milk Paint is the oldest type of paint! It's what was used to paint the hieroglyphics...and they're still there which is testament to how tough this paint is!
It's an all natural paint made from only 5 ingredients, that's milk protein (casein), limestone, clay, chalk and natural pigments.
You may have heard of Miss Mustard Seed Milk Paint and Homestead House Milk Paint, where do these come in to it? Well, Homestead House is the parent company of Fusion and its been making and selling Milk Paint for over 30 years. Miss Mustard Seed is a curated colour range for Homestead House, kind of like the Lisa Marie Holmes colours within the Fusion Mineral Paint range. Now we have the new
Milk Paint by Fusion range with 25 fresh, modern new colours and a new finer formulation that's even easier to mix.
How is Milk Paint different to Fusion Mineral Paint?
Fusion Mineral Paint is a water based acrylic paint.
It's pre-mixed and adheres to your surface to create a super smooth solid modern finish. If you're looking for a flawless finish this is your paint!
.
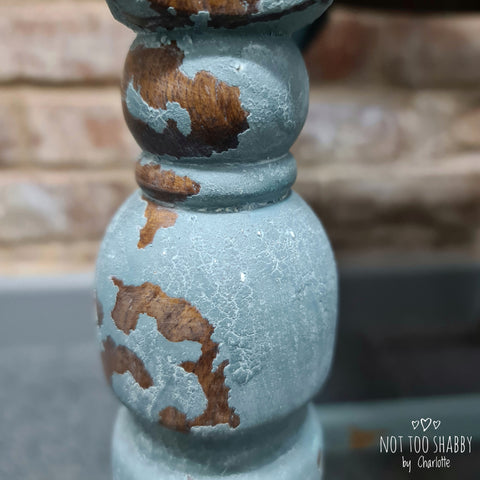
Milk Paint by Fusion comes as a powder and can be mixed in so many different ways to create so many different effects! It wants to act like a stain, it will absorb into your surface and bonds with it. Where it is unable to absorb it will give you that awesome chippiness that Milk Paint is so famous for. For complete control add
Bonding Agent and you can paint those shiny surfaces without any chipping.
This paint encourages you to get lost in the creative process and have happy accidents.
It doesn't cover the history of the piece, so is perfect for vintage and boho looks...it reacts with the history of your furniture for an incomparable authentic finish!
I absolutely adore Fusion Mineral Paint for those projects where I want to be completely in control and know exactly how my finished piece is going to turn out. I love it for that furniture or that room that needs a sleek modern aesthetic.
To satisfy the other side if my personality, for those projects where I want to get lost, get surprised along the way, really let out my inner artist... Milk Paint is just heaven.
Each coat dries in 20 minutes and cures in only 30 minutes, so I can complete a piece from beginning to end without my creative flow being interrupted.
How Do you Mix Milk Paint?

You can't get it wrong, it's super easy!
🖤 Mix 1 part water with 1 part powder to get a single cream consistency for solid coverage
🖤 Add more water to create a wash
🖤 Add more powder to create a thicker paint for crackle techniques or to spread it with a palette knife
🖤 Mix 1 part water, 1 part powder, 1 part
bonding agent for complete control with no chipping.
Even the mixing bit is fun!
Each colour is made up of lots of pigments, so you'll see little specks of yellow or white or blue flicking through your paint as you mix it. Leave them for sweet little striations on your paintwork or stir and watch them melt away.
My tip is to put the water into your container first, then add the powder on top...a quick stir and you're ready to paint.
What Prep is Needed For Milk Paint?
This depends on the finish that you're looking to achieve.
Option 1 - Solid Finish
Fully prep to achieve a smooth finish, so thoroughly clean and scuff sand. If your surface is shiny and you want to guarantee no chipping you can prime with Ultra Grip or mix 1 part ultra grip (also known as bonding agent), 1 part powder, 1 part water
Option 2 - Serendipity
Don't do any prep to let the Milk Paint surprise you. Most of the time if your Milk Paint is going to chip and crack this will happen on your second coat
Option 3 - Chipping
Apply resists to make sure you get crackle and chipping
Applying Resists To Milk Paint
A resist is something that you apply underneath your Milk Paint to repel the paint. Here’s a couple of resist examples -
🖤 You can rub your beeswax block against the edges of your piece to make it easier to distress

🖤 You can apply Hemp Oil and paint over it whilst it's still wet to create a really cool chippy effect

🖤 You can apply wax and paint over it wet to create a slightly different cool chippy effect
🖤 Applying a resist is a great way to control where your chipping will occur. It works great to apply resists between layers of paint so when it chips the layer underneath is revealed.

You should then lightly sand your project to remove the flakes and reveal the final effect...this is so amazing! I honestly get little flutters and get completely lost in the beautiful serendipity of this process. You can sand harder to get a higher level of distressing, or more softly with finer sandpaper to get less distressing. Why not try a scraper on the edges to get more chipping.
The way Milk Paint distresses is completely authentic and believable, your piece will look like it's slowly aged over years and years... no other paint can do that.
Sealing Your Milk Paint
Milk Paint dries to a very matte finish, if you're not going to be touching your piece it's fine to leave it unsealed for that chalky look...there's limestone in it so its totally tough! In most cases you'll want to seal it as it'll absorb greasy fingerprints whenever you touch it.
I love applying the sealing coat!
OMG it's just heaven to see the colours deepen and the beautiful details and lustre of your piece come to life before your eyes! It's addictive!
You can seal with any of our waxes, Stain and Finishing Oils or Hemp Oil.
Why not try a coloured wax to bring out the details...
like this Liming Wax, which accentuates the crackle for a beachy feel.
These louvre doors are sealed with areas of Driftwood Stain and Finishing Oil and areas of Natural Stain and Finishing Oil for variations of colour that highlight this beautiful distressed vintage aesthetic.
Are You Feeling Inspired?
I'm sure you've guessed by now that I'm in love with Milk Paint. I can't wait to hear from you after you fall in love with this paint too!
Please do leave me your comments, I'd love to hear your thoughts on this blog, Milk Paint...anything paint related really! xxx


Leave a comment